
Ad*

When my daughter Ava asked me if we could buy some air drying clay to make some Christmas decorations, my heart did a little happy whoop. Memories of pottery at school came flooding back, after a quick browse of our go-to craft supplier Hobbycraft, we were set to go with our chosen project.
Air drying clay is a inexpensive choice for art projects, it’s a great way for people of all ages, even experienced artists often enjoy the simplicity of air drying clay. Best of all, as in the name, doesn’t require an oven or kiln and can beautiful, unique projects.
We decided to decorate up our mini tree, it had been sitting in the garden all year and was in much need of a Christmas makeover. We made some personalised decorations; cute little shapes that we also used to decorate and personalise these Christmas crackers. Below is an easy step by step guide to how we created our crafty makes.
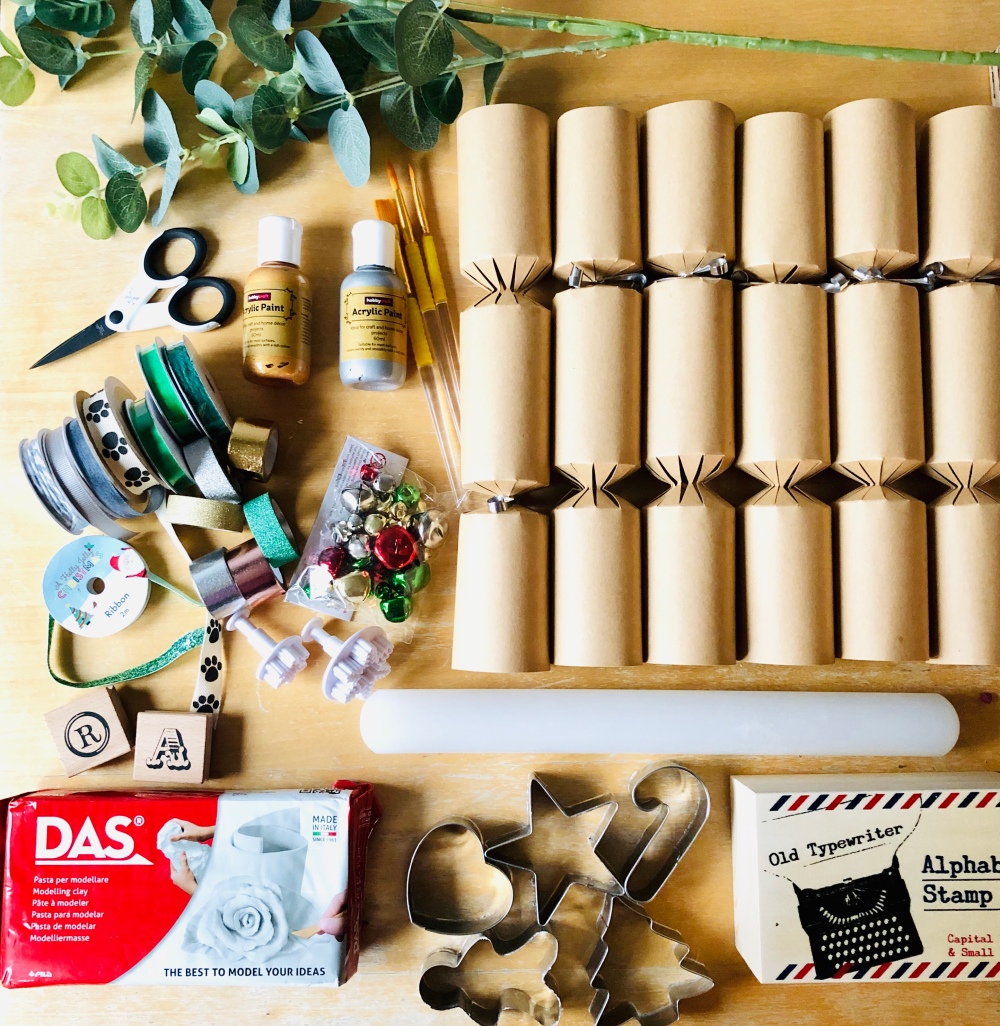
You will need:
Air dying clay
Cookie Cutters
Alphabet stamps (we also used these larger letter stamps and snow flake plunger cutters)
Non stick rolling pin
Fillable crackers kit
Various ribbons (we used this Christmas set, green sparkle ribbon and paw print ribbon)
Acrylic paint in silver and gold
Paint brushes
Scissors
Washi tape (we used this glitter set and Metallic set)
Assorted jingle bells
Faux Eucalyptus (please note you will need something to cut this with, please get an adult to help with this, we used these wire cutters)

First, roll out your clay, we tried a small amount first just to get used to it. Then cut out your shapes with the cookie cutters. You will also need to make a hole for hanging, we used the end of a paint brush.

Next, you will need to stamp your chosen names into the shapes, we also made some with just monogram letters and used a snow flake plunger-cutter to add some patterns.

Leave your shapes to dry for at least 24 hours, longer if they need it, they will turn completely white all over when they are ready.
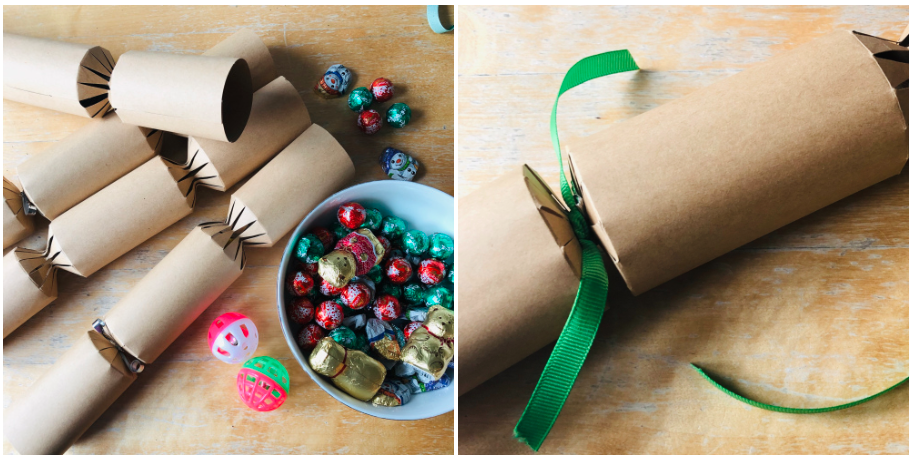
Meanwhile, you can get on with filling and decorating your fillable cracker kit. This pack comes with a hat, joke and snap already inside. We filled ours with chocolates, and some treats for the cats (yes, of course our cats need crackers too!) But, you could fill with little toys or gifts. Once your chosen treat is inside, tie the end.
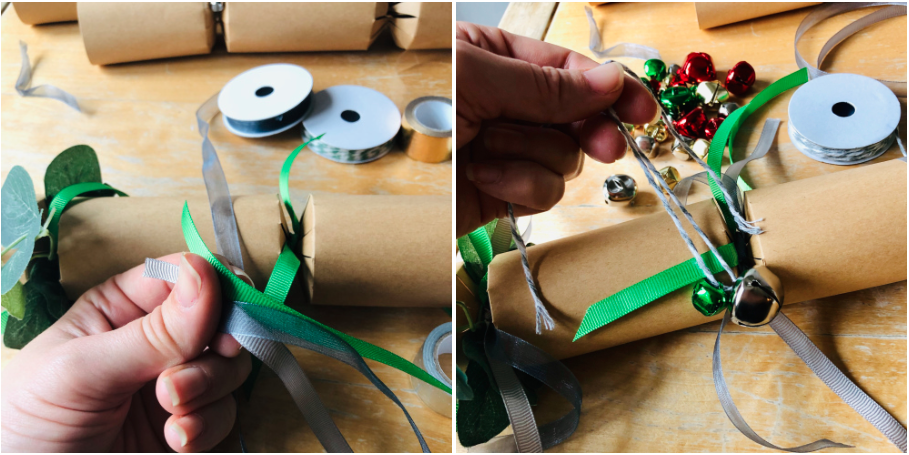
We had decided on a green, gold and silver theme so we tied on four different ribbons for a bit of wow factor. We then added these cute bells, we tied them on with bakers twine that came in the Christmas ribbon set.

We decorated the ends and the middle of our crackers with Washi tape. First, adding a metallic style, then overlapping with a glitter version. Stick all the the way around, making sure you start and finish at the back of your cracker.
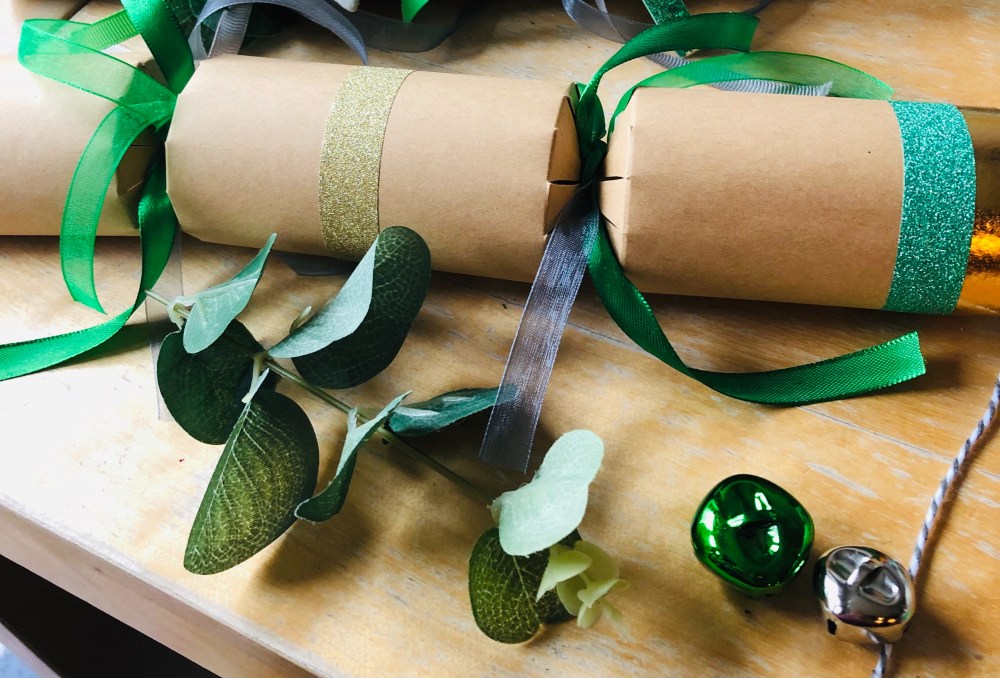
Then we added some faux eucalyptus at one end for a really festive touch. Snip off a 12cm sprig from your faux eucalyptus stem and wrap around your cracker end and then twist to secure.
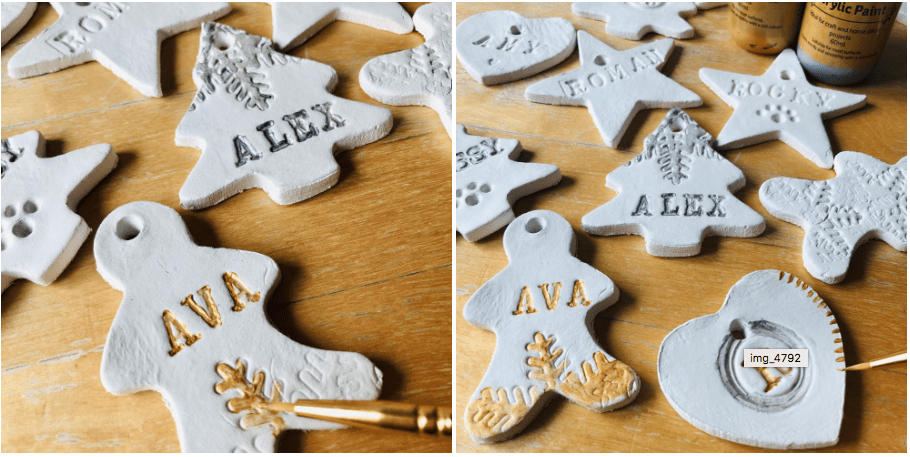
When your shapes are dry you can start to decorate with paint, use a fine brush to add a little metallic paint to the stamped areas to really make them stand out and sparkle.

Once dry, you can add the shapes to your crackers to finish them off. These can be used on the table as a name place setting, people can keep their little decoration after and hang on the tree. Or you could gift them or use as present tags.

We threaded up the rest of our pretty shapes with ribbon and had such fun hanging them on our little tree whilst listening to Christmas tunes on the radio. The whole project was a really fun weekend activity that I totally recommend.


I love the simplicity of our mini tree, just some twinkly lights and our handmade creations for all to see. We’re so proud of our little project and hope you like it to.
Until next time,
Amy x
Please visit Hobbycraft.co.uk for more info.
*Although this is a paid collaboration with Hobbycraft, all views and opinions are my own, I only work with brands I truly love and rate.

Amazing Amy! Will have to have a go at making these x
LikeLiked by 1 person
Thanks Hayley, it was so much fun xx
LikeLike
After exploring a few of the blog posts on your website, I honestly like your technique of blogging. I saved it to my bookmark website list and will be checking back soon. Please check out my website as well and let me know how you feel.|
LikeLike
Happy Christmas I have just made the clay ornaments to attach to gifts for my neighbors and they are adorable! Thank you for the inspo and wishing you well in the New Year!
LikeLike